How to Change Outlook View? Easy Steps to Return to Classic View
In May 2022, Microsoft Outlook announced the release of a new Outlook. The new version is a progressive web app, with a striking resemblance to Outlook.com.
However, Outlook’s loyal users highly criticized the said email client for the redesigned version. They claimed the recent version had mediocre performance compared to the Outlook classic view and lacked a variety of beneficial features.
Fortunately, Outlook enables users to revert to the original version. Hence, in this guide, we will explore how to change Outlook view and access the classic Outlook view. Go ahead and dive in to learn more!
Why You Should Change Back to Old Outlook?
Since Microsoft Office took over Outlook, it has been involved in corporate emailing, calendaring, and many other tasks. It offers a wide range of useful features that meet the needs of enterprises. However, many users who use Outlook for personal use find those features challenging.
To address this issue, Outlook announced a new update. The new Outlook was made simple for the users, having similar features, to those of the original Outlook. The new web-based suite consists of email, tasks, contacts, and calendar services, and the rest of the features, like creating Outlook templates, were the same as before.
However, loyal users found that the new version lacked various features, including offline services and the ability to create a contact list. As a result, it created the need to revert to the classic view and learn how to change view in Outlook.
Also read: 4 Easy Methods to Back up Your Gmail Account
How to Revert to Old Outlook?
If you prefer the old functional version rather than the redesigned version, consider reverting to the classic Outlook. However, the steps to revert to the old version are a bit different on Mac compared to Windows. Thus, we are going to explore how to access the Outlook classic view on both devices.
How to go Back to Old Outlook on Mac?
It’s pretty easy to go back to the old Outlook version on Mac. Simply follow the steps listed below.
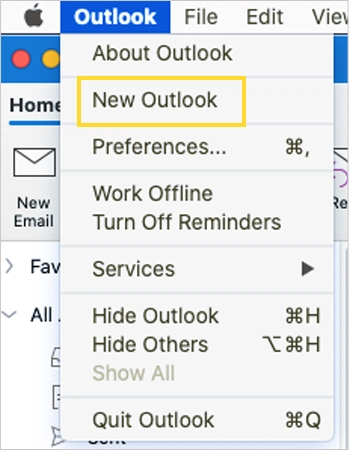
- Open Outlook on your Mac.
- Click on the Outlook menu in the top-left corner.
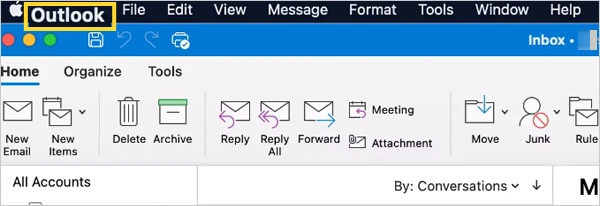
- Now, click on the New Outlook option from the menu.
- Click on the Revert option from the new tab that appeared.
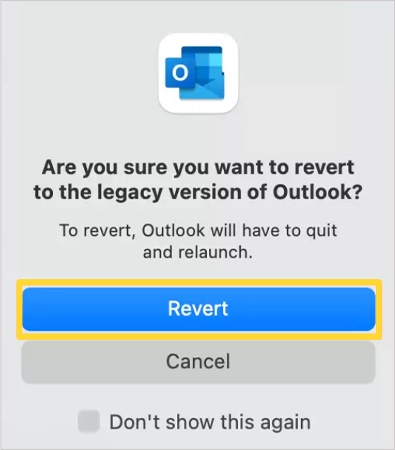
- Now, you have to wait for the application to revert to the classic view.
There is also an alternate way to change the view in Outlook on Mac. Here’s how to do it:
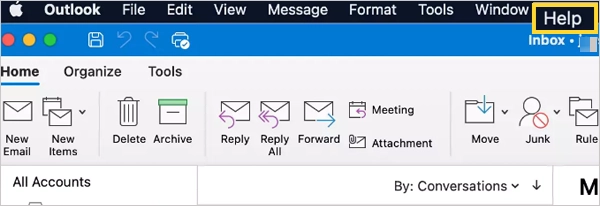
- Open Outlook on your Mac.
- Click on the Help menu.
- Now, from the drop-down menu, click on the Revert to Legacy Outlook option.
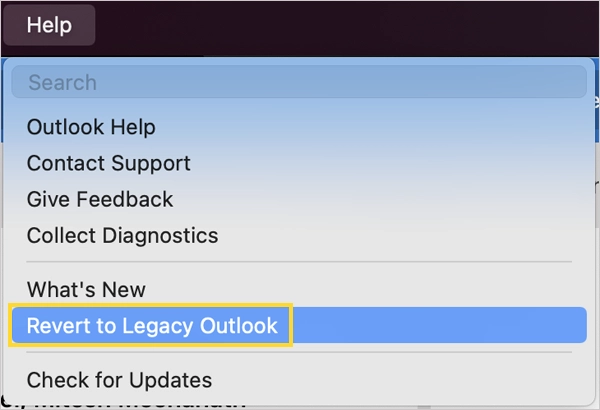
Now, just wait for the application to go back to the classic view.
How to Revert Outlook to Original View on Windows?
The method to activate the classic Outlook version on Windows is quite different. Here’s how to change Outlook email view on Windows:
- Open Outlook on Windows.
- Turn off the New Outlook toggle in the top-right corner.
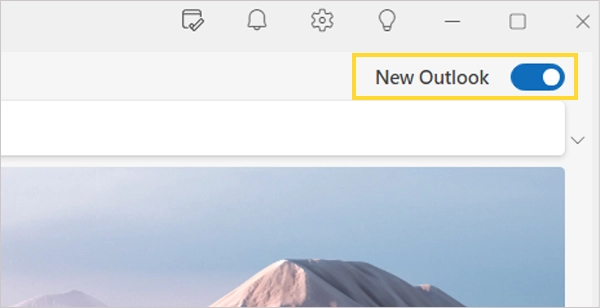
- Next, you will be asked to fill out your reason to go back to the older version.
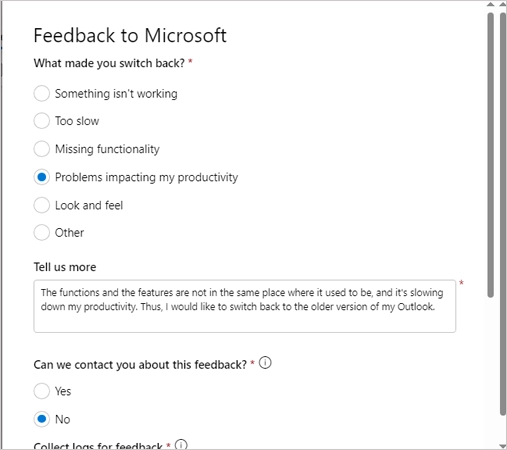
- Fill in the boxes and then click on the Submit button.
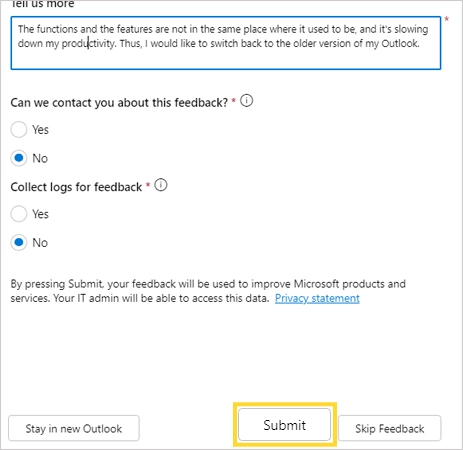
- Now, you can get back access to your old Outlook.
See how easy it is to revert to the old Outlook. Now, let’s look at how to customize the Outlook view.
Also read: How to do Gmail Search by Date: Ultimate Guide to Find the Older Emails in 2024
How to Customize the Microsoft Outlook View Settings?
If the above methods don’t work on your Outlook, try customizing your Outlook view to resemble the classic Outlook.
Using these features, you can customize the layout, adjust the size of the pane, or hide the panes according to your wishes. You can sort the emails based on different metrics, like size, date, or subject. On top of that, you can set up filters for efficient email management, like blocking the emails on Outlook or deleting them.
Let’s take a look at how to change the view in Outlook:
Change the font or font size of the message:
You can change the font settings of the messages using View Settings. Let’s see how to do that:
- Launch Outlook on your desktop.
- Click on the View tab at the top of the page.
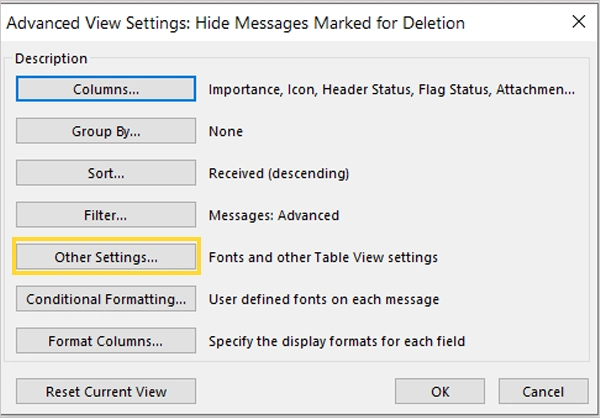
- Now, click on the View settings from the Current View menu.
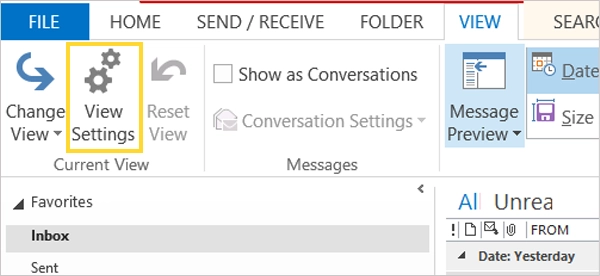
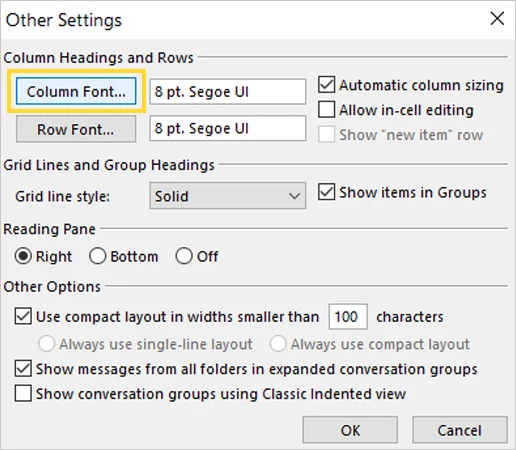
- Select Other Settings from the tab.
- Click on the Column Font to change the font settings.
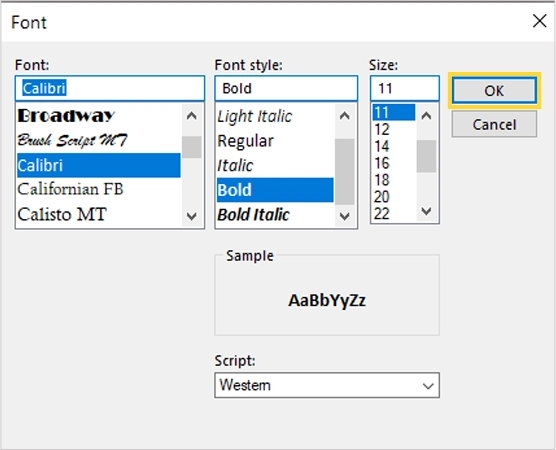
- Now, select the font options and press OK.
- Next, click on the Raw Font, and repeat the same process to change the font settings.
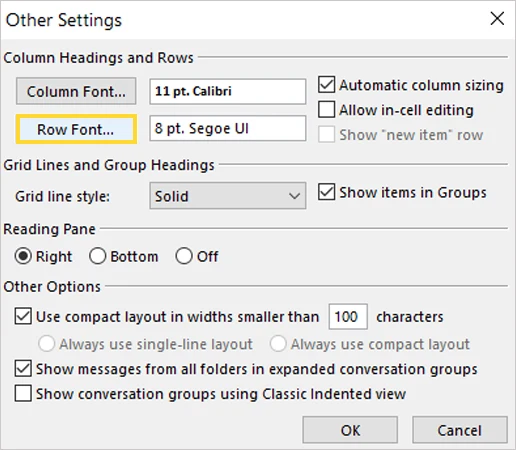
- Then, press OK and you are done. You will find the Outlook view changed.
Note
Outlook’s default font family, style, and size is 11-point Calibri in black.
Change Inbox View:
If your inbox view affects your productivity, consider changing it. Here’s how to do it:
- Head to the Current View menu and click on Change View.
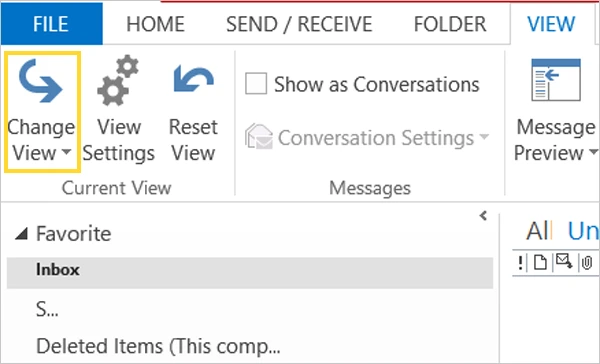
- Choose the Compact option.

Now, you will find that the Outlook inbox view has changed.
Create a New View:
Creating a custom view allows you to customize your Outlook inbox and messages. To do that, follow the steps listed below.
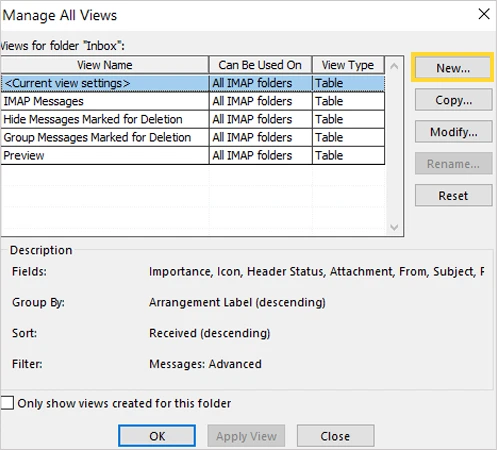
- Click on Change View under the Current View menu.
- Now, from the drop-down menu, select the Manage View option.

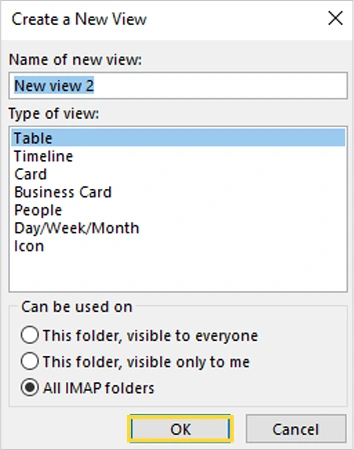
- On the new tab, select New to create new settings.
- Choose the metrics as you wish and press OK.
- After creating a new view, click on Apply View to save the changes.
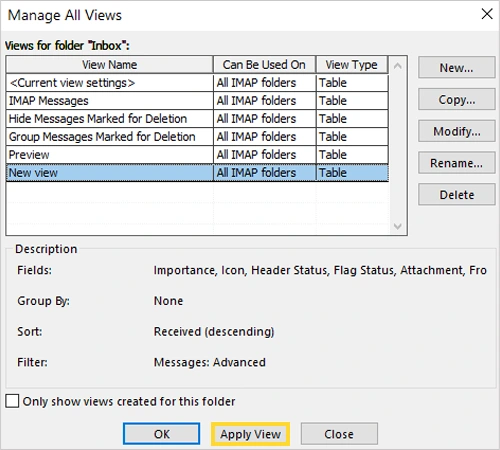
- Now, wait for the Outlook view to refresh, and you can see the Outlook email view changed.
Quick Tip:
- To delete a new view in Outlook: Go to Change View >> Manage View. Select the view you want to remove and click on Delete.
- Remember that you can’t delete the default views.
Change the Folder Pane Settings:
To change the location of the folders in Outlook, follow the steps mentioned below.
- On the View tab, go to the Layout menu.
- Now, click on Folder Pane and select Normal.

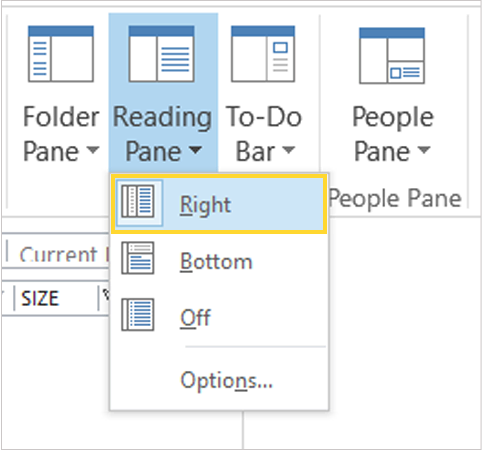
Modify the Reading Pane:
Here’s how you can also modify the reading pane in Outlook:
- On the layout menu, click on the Reading Pane.
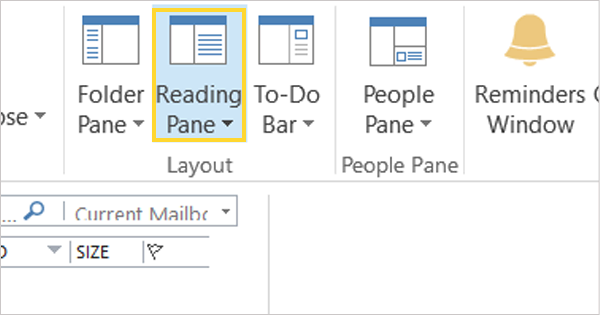
- Now, click on the Right option.
Changing the Font Size for Messages When Composing, Replying, or Forwarding:
If you wish to change the font size for messages while composing, replying, or forwarding messages, follow the steps listed below.
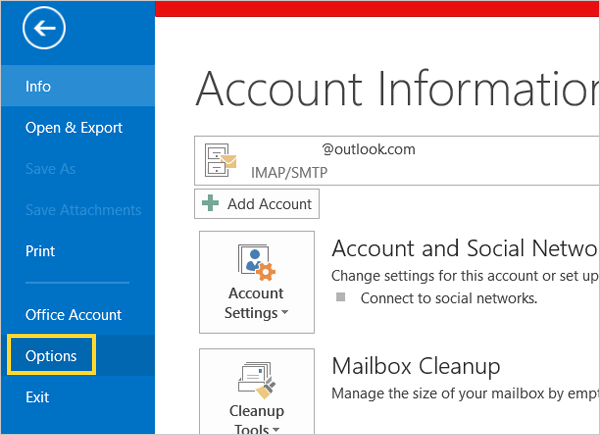
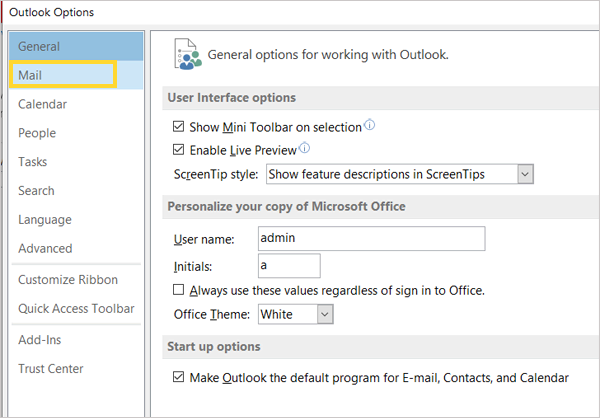
- Click on the File tab.
- Now, select Options from the left panel.
- Then, select Mail from the left panel.
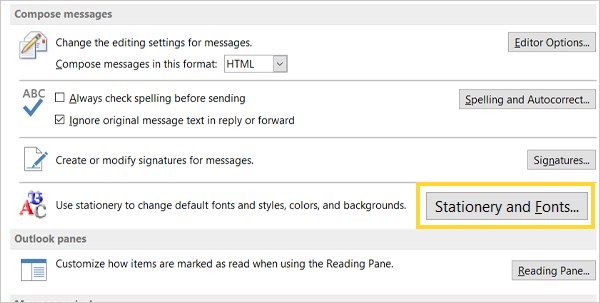
- Now, click on Stationery and Fonts under the Compose Messages menu.
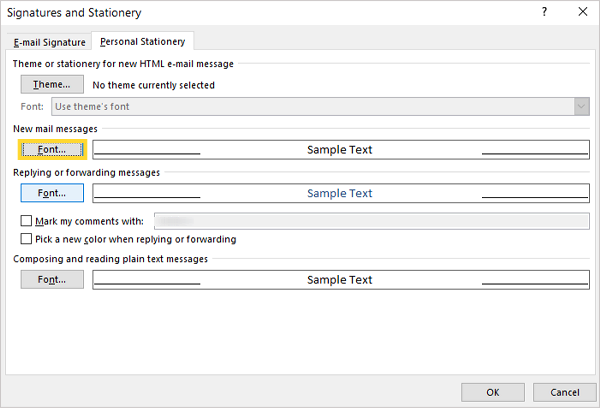
- Now, select Font under New mail messages.
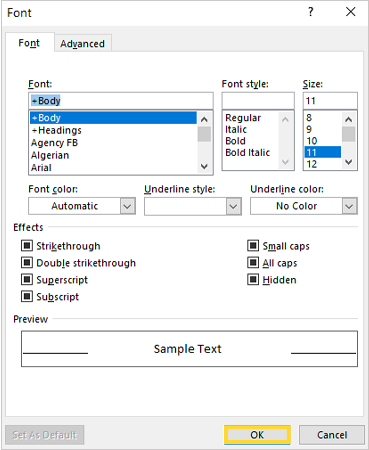
- Select the font size, style, and family. Then press OK.
- Now, click on Font under Replying or Forwarding Messages.
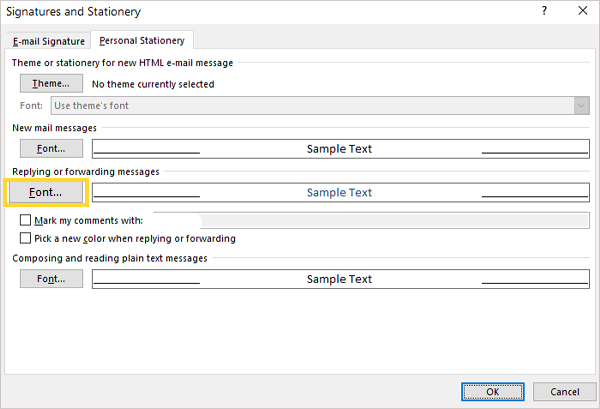
- Then choose the font options and press OK.
- Now, press OK to save the changes.
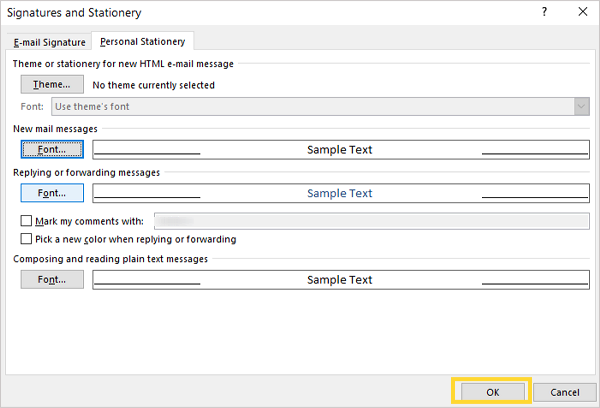
This is how you can change the font size and style while composing and replying.
Changing Message Preview in Outlook:
To change the preview of the messages in Outlook:
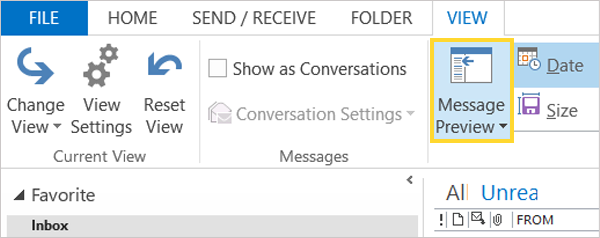
- Head to the View tab.
- Now, click on Message Preview from the toolbar.
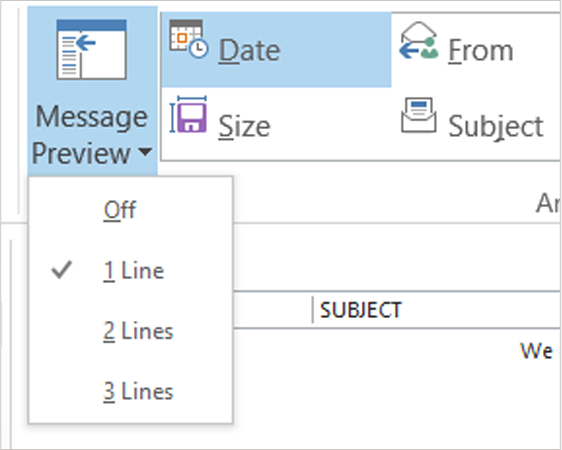
- From the drop-down menu, choose from 1 line, 2 lines, or 3 lines for the text to display on the previews.
This was all about the customization setting options on Microsoft Outlook. Let’s move forward to troubleshoot some common issues.
Tips to Fix the Common Issues with Changing Views on Outlook
There is a possibility of encountering some issues while changing the Outlook view. Hence, we have brought the common fixes to help you with prospective problems. Here is a list of some common troubleshooting tips:
- Check for Updates
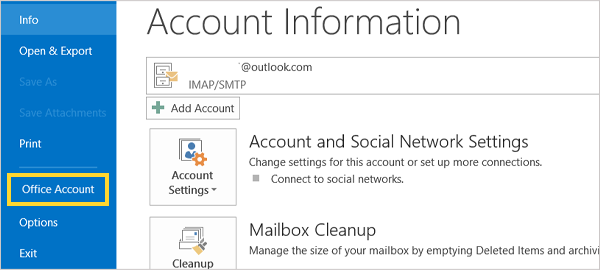
- Click on the File option in the top-left corner.
- Head to the Office Account.
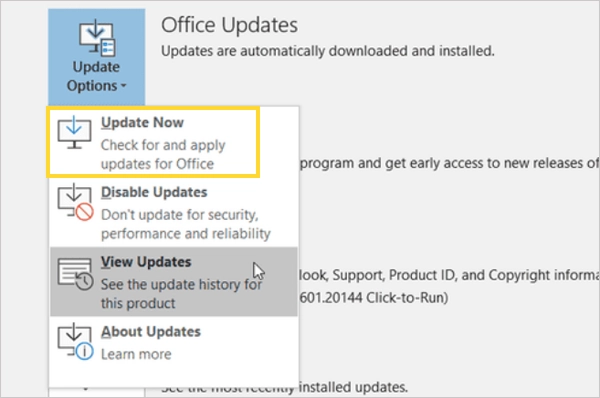
- Click on Update Options. Then, select Update Now from the menu.
- Click on the File option in the top-left corner.
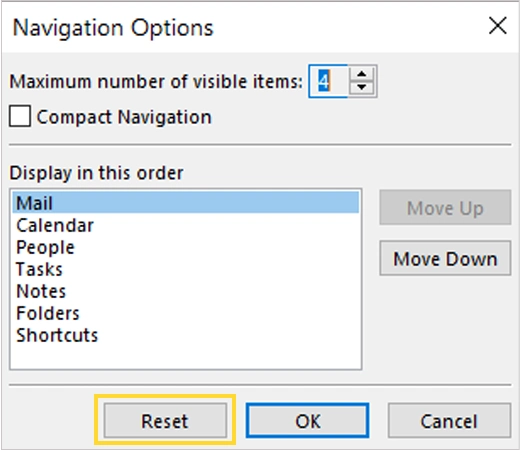
- Clear Cache
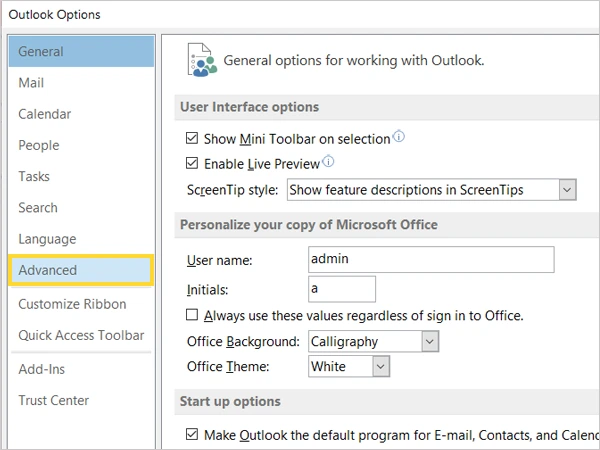
- Head to the File menu and click on Options from the left panel.
- Select Advanced from the panel on the left side.
- Click on Navigation under the Outlook panes menu.
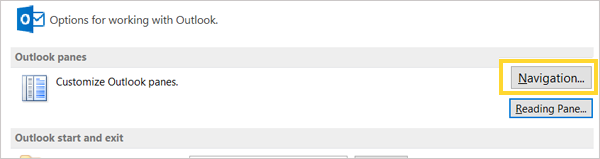
- On the new tab, click Reset.
- Head to the File menu and click on Options from the left panel.
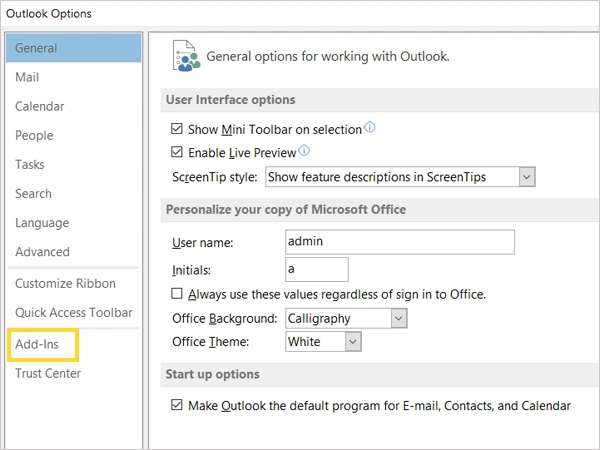
- Disable Add-ins
- Go to File and click on Options.
- Select Add-ins from the panel.
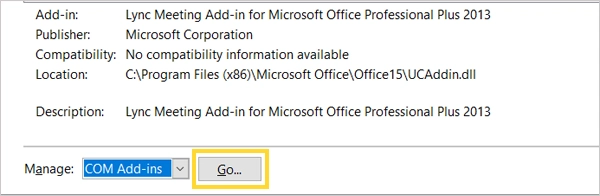
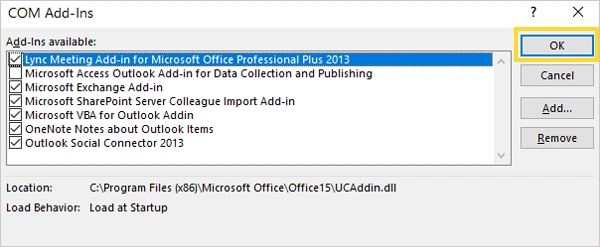
- Locate COM Add-ins and select Go.
- Uncheck the add-ins causing issues and press OK.
- Create a New Profile
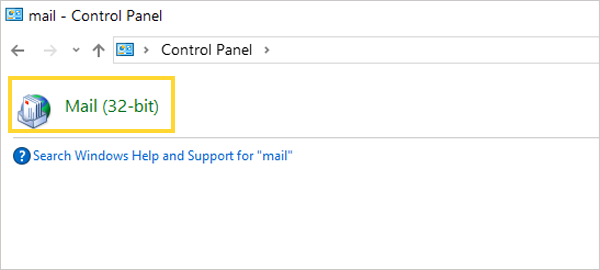
- Go to the Control Panel on your system. Locate the Mail and click on it.
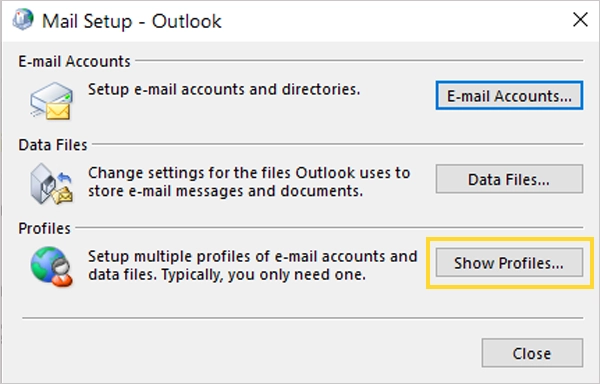
- Under the profile section, select Show Profiles.
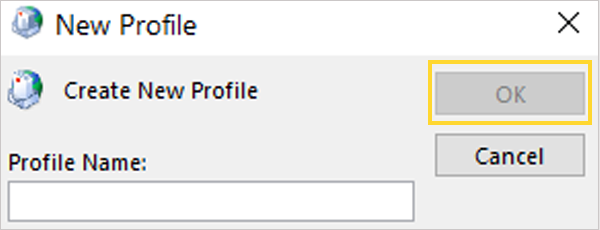
- Next, click on Add to add a new profile.

- On the next tab, enter your name and press OK.
- Then, follow the instructions to continue with your profile creation.
- Go to the Control Panel on your system. Locate the Mail and click on it.
- Repair Office Installation
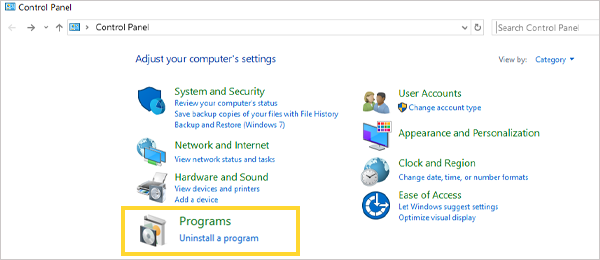
- Head to the Control Panel on your device. Click on Programs.
- Then, click on Programs and Features.

- Navigate to Microsoft Office and right-click on it. Choose Change from the drop-down menu.
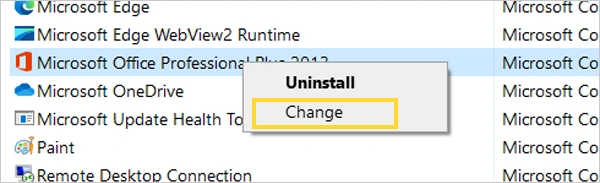
- Now, the Office will be repaired in no time.
- Head to the Control Panel on your device. Click on Programs.
These simple tips may help you solve the forthcoming issues with the Microsoft Outlook view.
Conclusion
Outlook has now become the email client that helps individuals and organizations streamline various tasks. It always tries to experiment and find ways to meet the user’s needs. However, sometimes it backfires, and the new Outlook is the perfect example.
To address this issue, follow the aforementioned steps and get back the old Outlook that facilitates functionality. Additionally, ensure frequent updates to the Outlook configuration to avoid issues with the Outlook view.
Read next: How to Change Gmail Background? [Step by Step Guide]
FAQs
Ans: To switch back to old Outlook on Mac:
- Click on the Outlook option in the top-left corner.
- Select New Outlook, and then click Revert to continue.
Another method is to click on the Help option >> Revert to Legacy Outlook.
Ans: Turn off the toggle for New Outlook in the top-right corner. State your reasons and submit it.
Ans: To customize the Outlook view, head to the view tab in Outlook. On the view tab, click on view settings >> other settings >> Column Font or Row Font. Now, change the font settings and you are done.
Ans: No, changing the Outlook view to classic won’t change the Outlook settings or data. It will only change the appearance of Outlook.
Source Links: